Whiteboard Recorder captures high-resolution video of multiple whiteboards while still allowing for flexible camera placement. It provides a non-intrusive solution for archiving lessons and lectures to aid students that missed class.
- Python 3
- Network connection for installation only
- A capable computer with the software requirements installed
- A webcam with a decently high resolution (preferably 1920x1080 or better)
- A microphone
- (Optional) A USB cable extender rated for the USB version that the camera communicates with, to mount the camera far from the computer
- (Optional) A USB hard drive, SSD, or even flash drive/SD card that is either high endurance or disposable for storing recordings
As explained in full detail at https://github.com/nvm-sh/nvm, run the following commands to install node using nvm.
- Run
curl -o- https://raw.githubusercontent.com/nvm-sh/nvm/v0.39.5/install.sh | bashto download and install nvm - Close and reopen your terminal
- Ensure that
command -v nvmreturnsnvm - Install the latest version of node using
nvm install node
- Use
git clone https://github.com/PicoPlanetDev/whiteboard-recorderto download the source code cd whiteboard-recorderthencd frontendthennpm installcd ../backendthen create a virtual environmentvenvin the backend directory- On Windows:
python -m venv venvand activate the venv with.\venv\Scripts\activate - On Linux:
python3 -m venv venvand activate the venv withsource venv/bin/activate
- On Windows:
- Install the required packages
- On Windows:
pip install -r requirements.txt - On Linux:
pip3 install -r requirements.txt
- On Windows:
- Install required software:
- On Windows: Place
ffmpeg.exein thewhiteboard-recorder/backenddirectory - On Linux:
sudo apt install -y ffmpeg v4l-utils
- On Windows: Place
- Copy
.env.exampleto.envand modify it for your configuration if necessary- If you are simply accessing Whiteboard Recorder over HTTP on your local network (or with a service such as Tailscale), there's no need to further modify
.env - If you are setting up access to Whiteboard Recorder on a custom domain (or subdomain) using a reverse proxy or a service such as a Cloudflare Tunnel, the
VITE_API_ENDPOINTvariable must be modified to match your domain configuration, with/apiadded on to the end. This variable must be in quotation marks as well, such as"https://whiteboard-recorder-api.mydomain.com/api".
- If you are simply accessing Whiteboard Recorder over HTTP on your local network (or with a service such as Tailscale), there's no need to further modify
- Edit
whiteboard-recorder-backend.serviceandwhiteboard-recorder-frontend.serviceto match your username and path to thewhiteboard-recorderdirectory - Edit
frontend/start.shto match your username - Copy both service files to the
/etc/systemd/systemdirectory:
cp whiteboard-recorder-backend.service /etc/systemd/system/whiteboard-recorder-backend.service
cp whiteboard-recorder-frontend.service /etc/systemd/system/whiteboard-recorder-frontend.service- Enable and start the services using sysctl:
sudo systemctl enable whiteboard-recorder-backend.service
sudo systemctl enable whiteboard-recorder-frontend.service

sudo systemctl start whiteboard-recorder-backend.service
sudo systemctl start whiteboard-recorder-frontend.service- Reboot and test that Whiteboard Recorder starts successfully. If so, continue to Setup:
Select Settings in the navbar and select your microphone and camera(s), then setup their respective parameters as necessary.
- On Linux, it is necessary to manually enter the audio and video devices. Use
arecord -Lto see the available audio inputs, andv4l2-ctl --list-devicesto see available video devices
| Setting | Description | Example |
|---|---|---|
| Audio input device (Windows) | Microphone to record audio from (Windows). Leave default on Linux. | Line-in |
| Custom audio device CARD (Linux) | The sound card to pass to FFMPEG for ALSA audio recording | Microphone |
| Custom audio device DEV (Linux) | The device number for ALSA. Often left blank | 0 |
| End Recording Delay | Waits for FFMPEG to finish up before forcibly stopping | 2 |
| Video stack direction | Whether videos from two cameras should be combined into one video side-by-side or vertically | Horizontal |
| Video | ||
| First video/Second video | The order to stack the two videos, in case you need to reverse it without changing video device settings | 0,1 respectively |
| Video # enabled | Whether the system should attempt to record video from this camera | True |
| Video device (Windows) | The video device to associate with this camera (Windows) or default is placeholder /dev/video0 on Linux | c922 Pro Stream Webcam |
| Custom video device Name (Linux) | Should be used on Linux. /dev/video#, and the number (#) often doesn't increment by 1 between video devices | /dev/video0 |
| Custom video device Index (Linux) | Should be used on Linux. The webcam index given to OpenCV's VideoCapture function | 0 |
| Video resolution | The resolution for FFPEG (and OpenCV) to request the camera to record at | 1920x1080 |
| Framerate | The number of frames per second to request the camera to record at | 15 |
| Focus (Linux) | Locks the camera focus if it is inconsistent during recording. -1 allows autofocus, 0 is infinity, higher numbers are closer | 0 |
| Input format (Linux) | If your camera supports h264 or mjpeg, use that compression here. Otherwise, yuyv422 for raw and combine with Pixel format below. |
mjpeg |
| Pixel format (Linux) | Leave blank when using compressed input format. Otherwise, something like yuyv422 |
Leave blank |
| Detect corners on recording start | Attempt to detect corners from both cameras when the video recording begins, in case the cameras have been bumped. | True |
| Files | ||
| Automatically process recordings | Whether a processing job should be immediately started after recording finishes (versus manually) | True |
| Job Name Format | How to name recordings. Can be any string with time.strftime strings included. See https://docs.python.org/3/library/time.html#time.strftime | %m-%d-%Y %H-%M-%S |
| Recording Directory | Where to storage recordings, potentially on an external hard drive. | /media/USERNAME/EXTERNAL_DRIVE_NAME/recordings on Ubuntu with auto-login |
| Recording Copy Directory | Recordings will be copied after processing to this location, potentially on an external hard drive. Leave blank to disable. | /media/USERNAME/EXTERNAL_DRIVE_NAME/copies |
| Periods | ||
| Append period names to files | Make recordings more easily identifiable by appending period names to files. These are based on fixed times and assume that classes begin at the same time each day | True |
| Period Names | The strings to append to the end of the file, ordered chronologically, and corresponding to below Period times | Before School,Mech P1,E+M P2,Mech P5,Mech P6,Astro P8,After School |
| Period Times | The beginning times associated with each period. Periods last until the next beginning time. Formatted HH:MM in 24-hour time | 07:30,08:10,09:02,11:37,12:28,14:10,15:03 |
- Configure the bird's eye perspective warp using the Launch video configurator button:
- Select the video device you want to set up
- Click Capture frame to get an image for reference
- Click the top left corner of the whiteboard
- Select the colored arrow button for the top right corner, then click the image again to set that corner
- Repeat this process for the two remaining corners
- Click Save then Preview warped
- Make any changes you need and save again, repeat the process for another camera, or close the dialog and continue
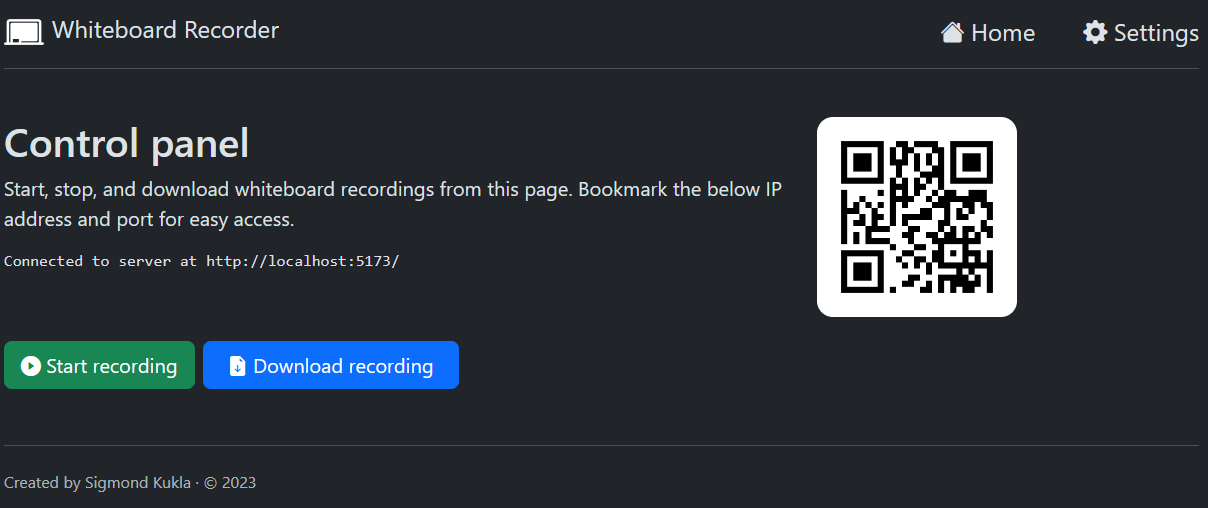
- Return to the root page by selecting Home in the navbar, then begin a recording with the Start recording button
- End the recording by clicking the Stop recording button.
- The recording is processed automatically, then will be available by clicking the Download recording button.
Running Whiteboard Recorder using the frontend and backend services doesn't seem to produce logs of any Python errors. Instead, follow these steps to run it manually for debugging. Then make sure to restart it using the steps above.
- Stop the frontend and backend services:
sudo systemctl stop whiteboard-recorder-backend.service
sudo systemctl stop whiteboard-recorder-frontend.servicecdinto thewhiteboard-recorderdirectory- Create a second terminal emulator tab/window in the same directory
- In the first terminal:
cd frontendthennpm run dev -- --host - In the second terminal:
cd backendthen- On Windows:
.\venv\Scripts\activatethenpython app.py - On Linux:
source venv/bin/activatethenpython3 app.py
- On Windows:
- Navigate to
http://localhost:5173or the host's IP address followed by port 5173.
If you place ArUco markers on the corners of each whiteboard in the following pattern, Whiteboard Recorder can automatically detect the corners of the whiteboards. The practical upshot of this is that even if cameras are bumped or jostled between recording sessions, the system can auto-calibrate without the need for more human interaction.
ArUco marker layout
0               1    4                5
 ______________        ______________
 |            |        |            |
 |    LEFT    |        |   RIGHT    |
 |____________|        |____________|
2               3    6                7
You'll need the first eight (id 0-7) ArUco markers from the 4x4 dictionary to be printed at a reasonable scale that details are clearly visible to the cameras.
A printable template I created for this purpose is available here: Printable ArUco Markers for Whiteboard Recorder
Alternatively, you may generate your own marker images using an online generator (remember to keep whitespace around the marker), or using the supplied Python script in the backend directory.
- Ensure that all dependencies are already installed (Whiteboard Recorder is already up and running)
- Change to the
backenddirectory:cd PATH/TO/whiteboard-recorder/backend - Activate the virtual environment:
source venv/bin/activate - Run the script with
python3 arucogen.py - Repeatedly press any key to iterate through the necessary IDs
To customize arucogen.py, consider editing the range(0,8) statement to change which IDs are included. Or, to edit the markers themselves, change the arguments to the generate_marker(... function call as per the docstring for the function included above in the script.
The following screenshot is cropped for obfuscation but otherwise unaltered, demonstrating the utility of ArUco markers for corner detection.

- Edit
whiteboard-recorder-backend.serviceandwhiteboard-recorder-frontend.serviceto match your username and path to thewhiteboard-recorderdirectory - Edit
frontend/start.shto match your username - Copy both service files to the
/etc/systemd/systemdirectory:
cp whiteboard-recorder-backend.service /etc/systemd/system/whiteboard-recorder-backend.service
cp whiteboard-recorder-frontend.service /etc/systemd/system/whiteboard-recorder-frontend.service- Enable and start the services using sysctl:
sudo systemctl enable whiteboard-recorder-backend.service
sudo systemctl enable whiteboard-recorder-frontend.service

sudo systemctl start whiteboard-recorder-backend.service
sudo systemctl start whiteboard-recorder-frontend.service- Reboot and test that Whiteboard Recorder starts successfully.
In many cases, using an external hard drive may be beneficial to Whiteboard Recorder functionality, such as if you would like to:
- Archive recordings long-term
- Record many lectures without erasing
- Avoid excessive SSD wear
- Upgrade storage capacity down-the-road
To support this, Whiteboard Recorder has two options:
- Recording directory
- Recording copy directory
Whiteboard Recorder will automatically save all data (including temporary data and intermediate products) within an appropriately named recording folder in the recording directory. In my setup, my recording directory is located on an old 1TB external USB hard drive. It doesn't seem to have great specs, but I am able to successfully streamcopy two MJPEG-compressed camera feeds at 15-30 FPS.
Alternatively, if you'd like to streamcopy video feeds in an uncompressed (think yuyv422) or high resolution or high framerate, the recording directory might need to be on an SSD. Keep in mind that you could rack up terabytes written pretty quickly, so check your SSD's endurance ratings and determine if it is a good fit. In this case, however, you may use the recording copy directory option, which will copy recordings from the recording directory to another location when possible.