
Api server boilerplate with database support for Luracast Restler
Restler is an "API First Micro Framework" that offers better web api by design.
Every branch in this git repository contains different application templates to suit your specific needs.
Eloquent App provides laravel 7 database support for your restler 4 application development
Make sure PHP 7.3 or above is available on your server
Composer is used to manage the dependencies. If you don't already have composer installed, we recommend installing it globally
Instructions to install composer globally are available in getcomposer.org
Download as zip, and unzip or clone this repository in your development machine.
rename the folder to match your application
open terminal inside this newly created folder
composer install
This will install all the dependencies
Eloquent Application Template offers lluminate Database support along with Migration, Seeding and Artisan.
Note:- This template is built using Laravel Database
Laravel is a web application framework with expressive, elegant syntax. We extracted the database functionality from it and made it available for restler
The Illuminate Database component is a full database toolkit for PHP, providing an expressive query builder, ActiveRecord style ORM, and schema builder. It currently supports MySQL, Postgres, SQL Server, and SQLite.
We combined it with Illuminate FileSystem and Illuminate Console to make Artisan work with database related commands.
There is a sample API Class called Home in app/Http/Controllers directory that has the following success message
for the /home/ of the API.
{
    "success": {
        "code": 200,
        "message": "Restler is up and running!"
    }
}
On your development machine, you can run the development server by
running the php artisan serve on the project root. This will run the php development server at
port 8000 on localhost by default. If you need to change that you may use the command line
options as shown below
php artisan serve --port=8080
This project also comes with swagger ui for testing and documenting the api. You can access that using the following url
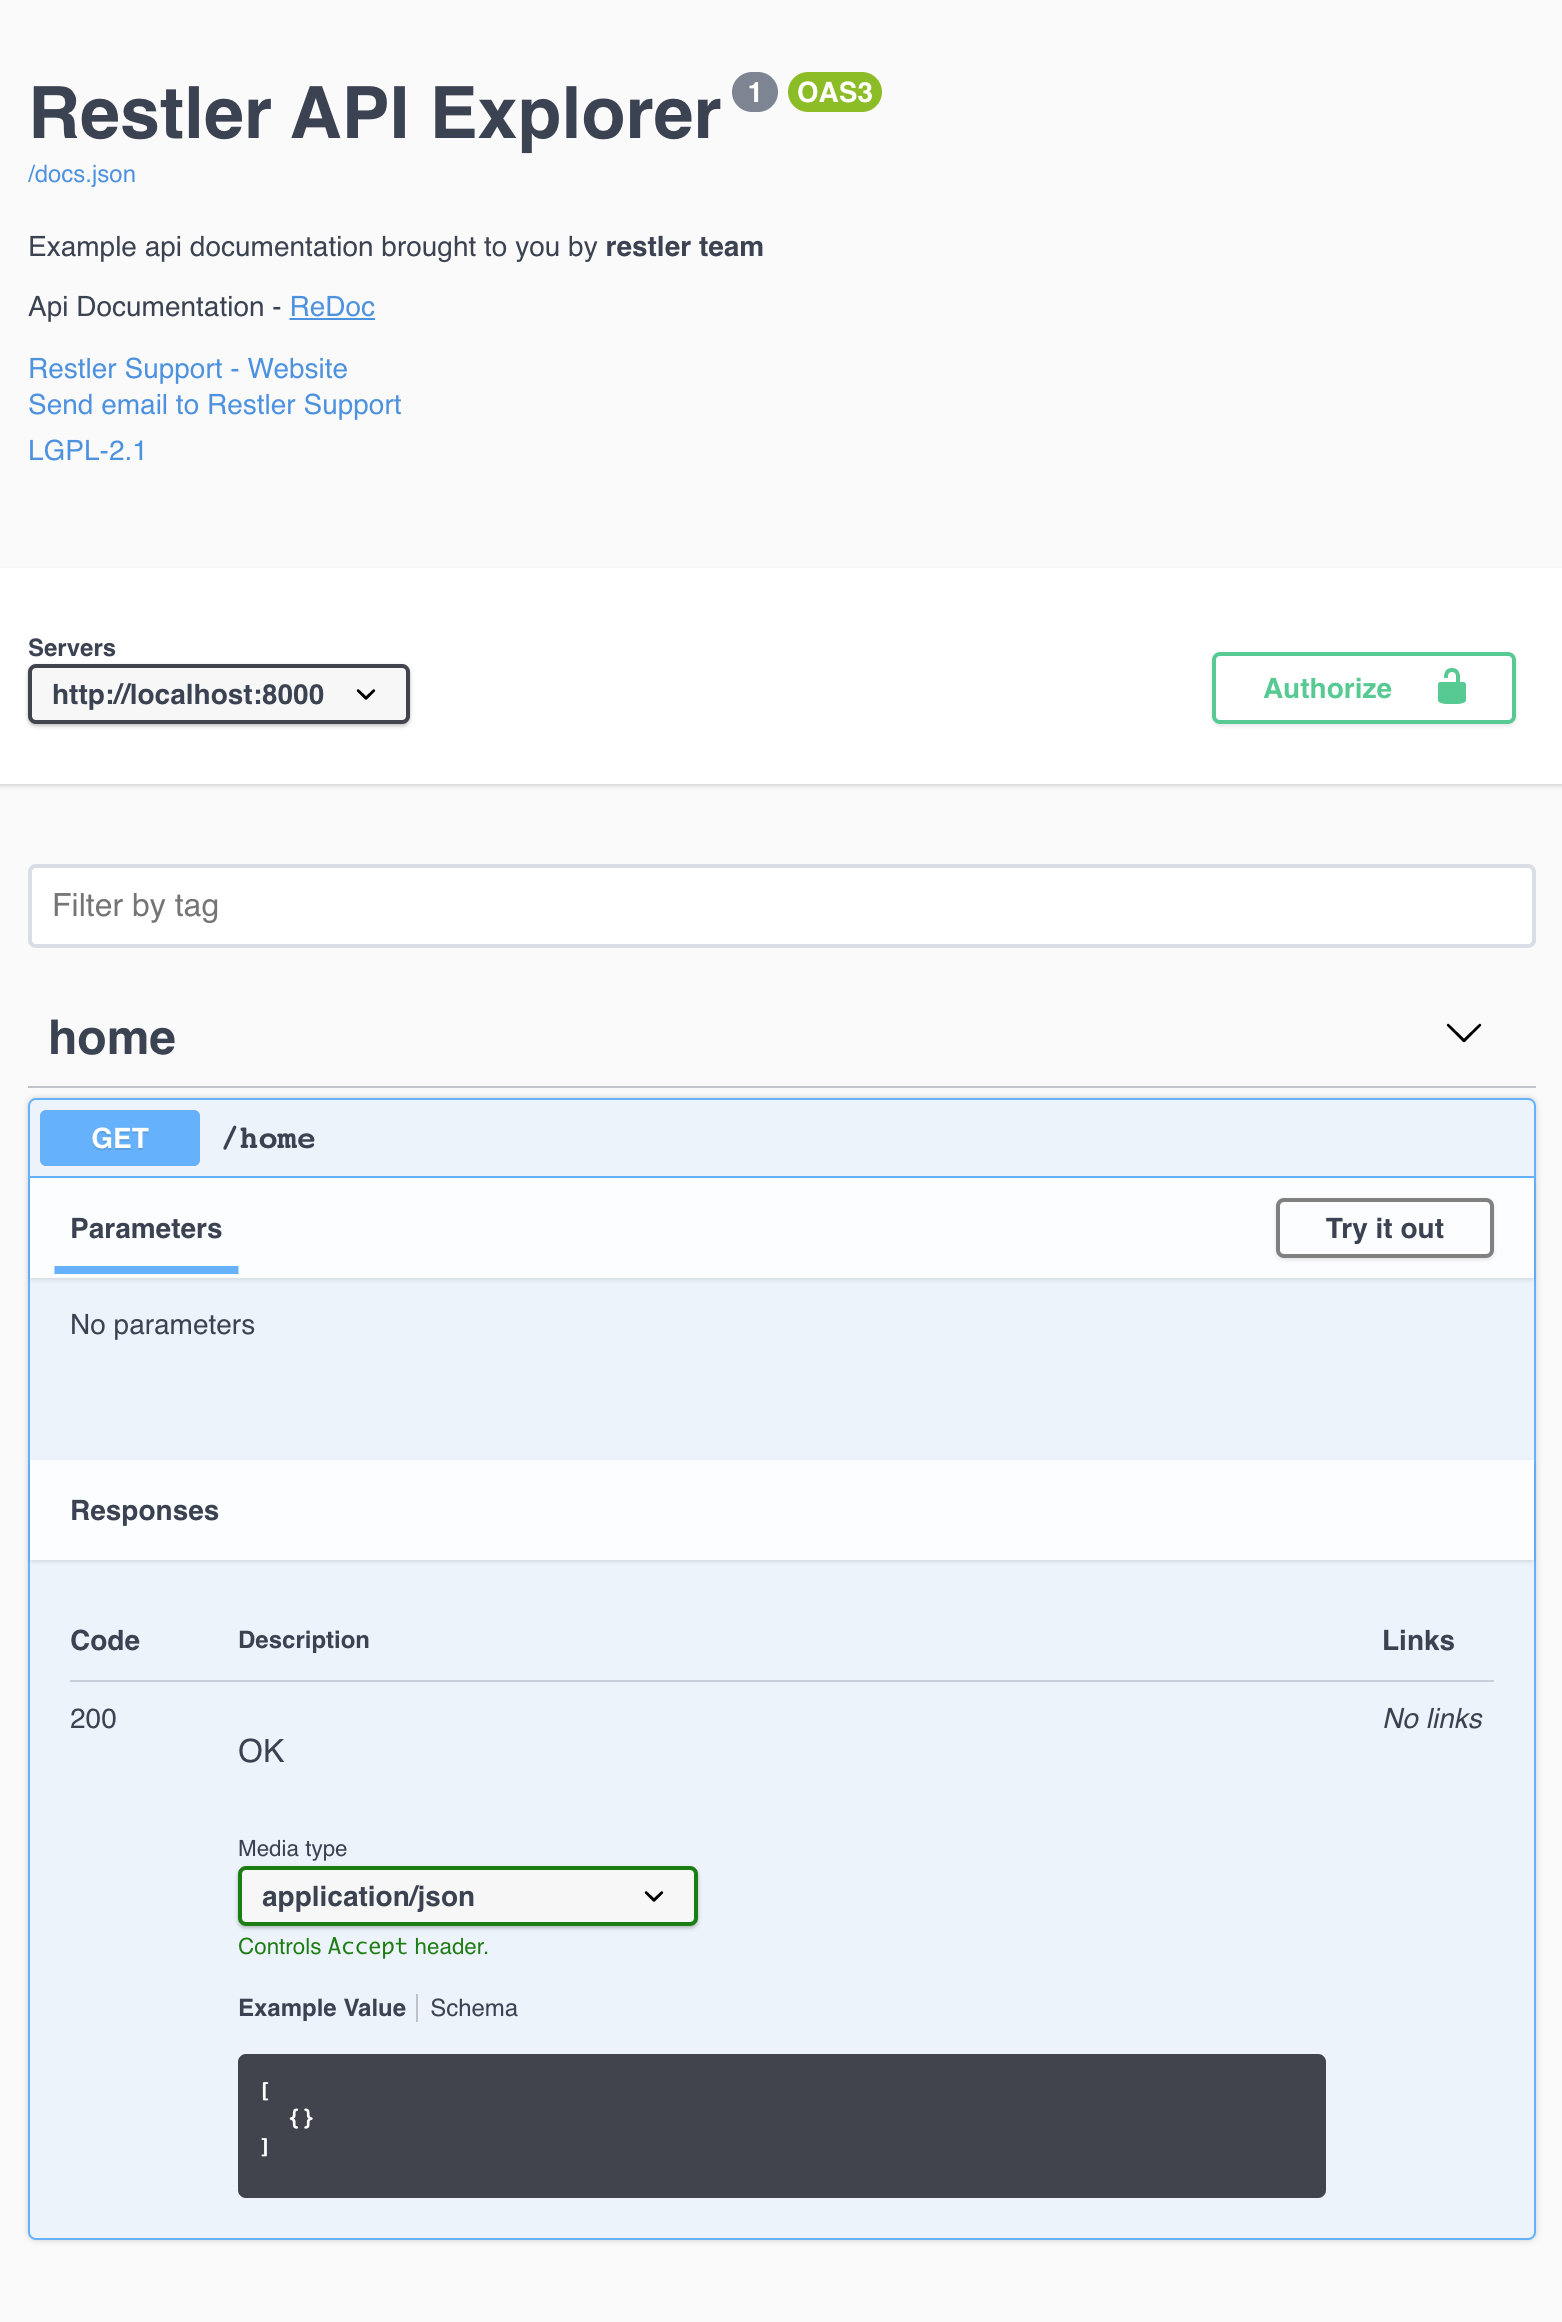
index.php in the public folder includes the autoload.php in bootstrap folder which internally
uses composer autoloader. This enables lazy loading for all db related classes. Only when you call
one of the DB related class, database engine is initialized.
Refer to all database related sections on Laravel 7 website.
This app uses sqlite database by default. So make sure the file exists by running the following command in the terminal
touch database/database.sqlite
Note:- Feel free to change the database by using an
.envfile or editingconfig/database.php
Check the database connection with the following command.
php artisan migrate:install

Migration table created successfully.
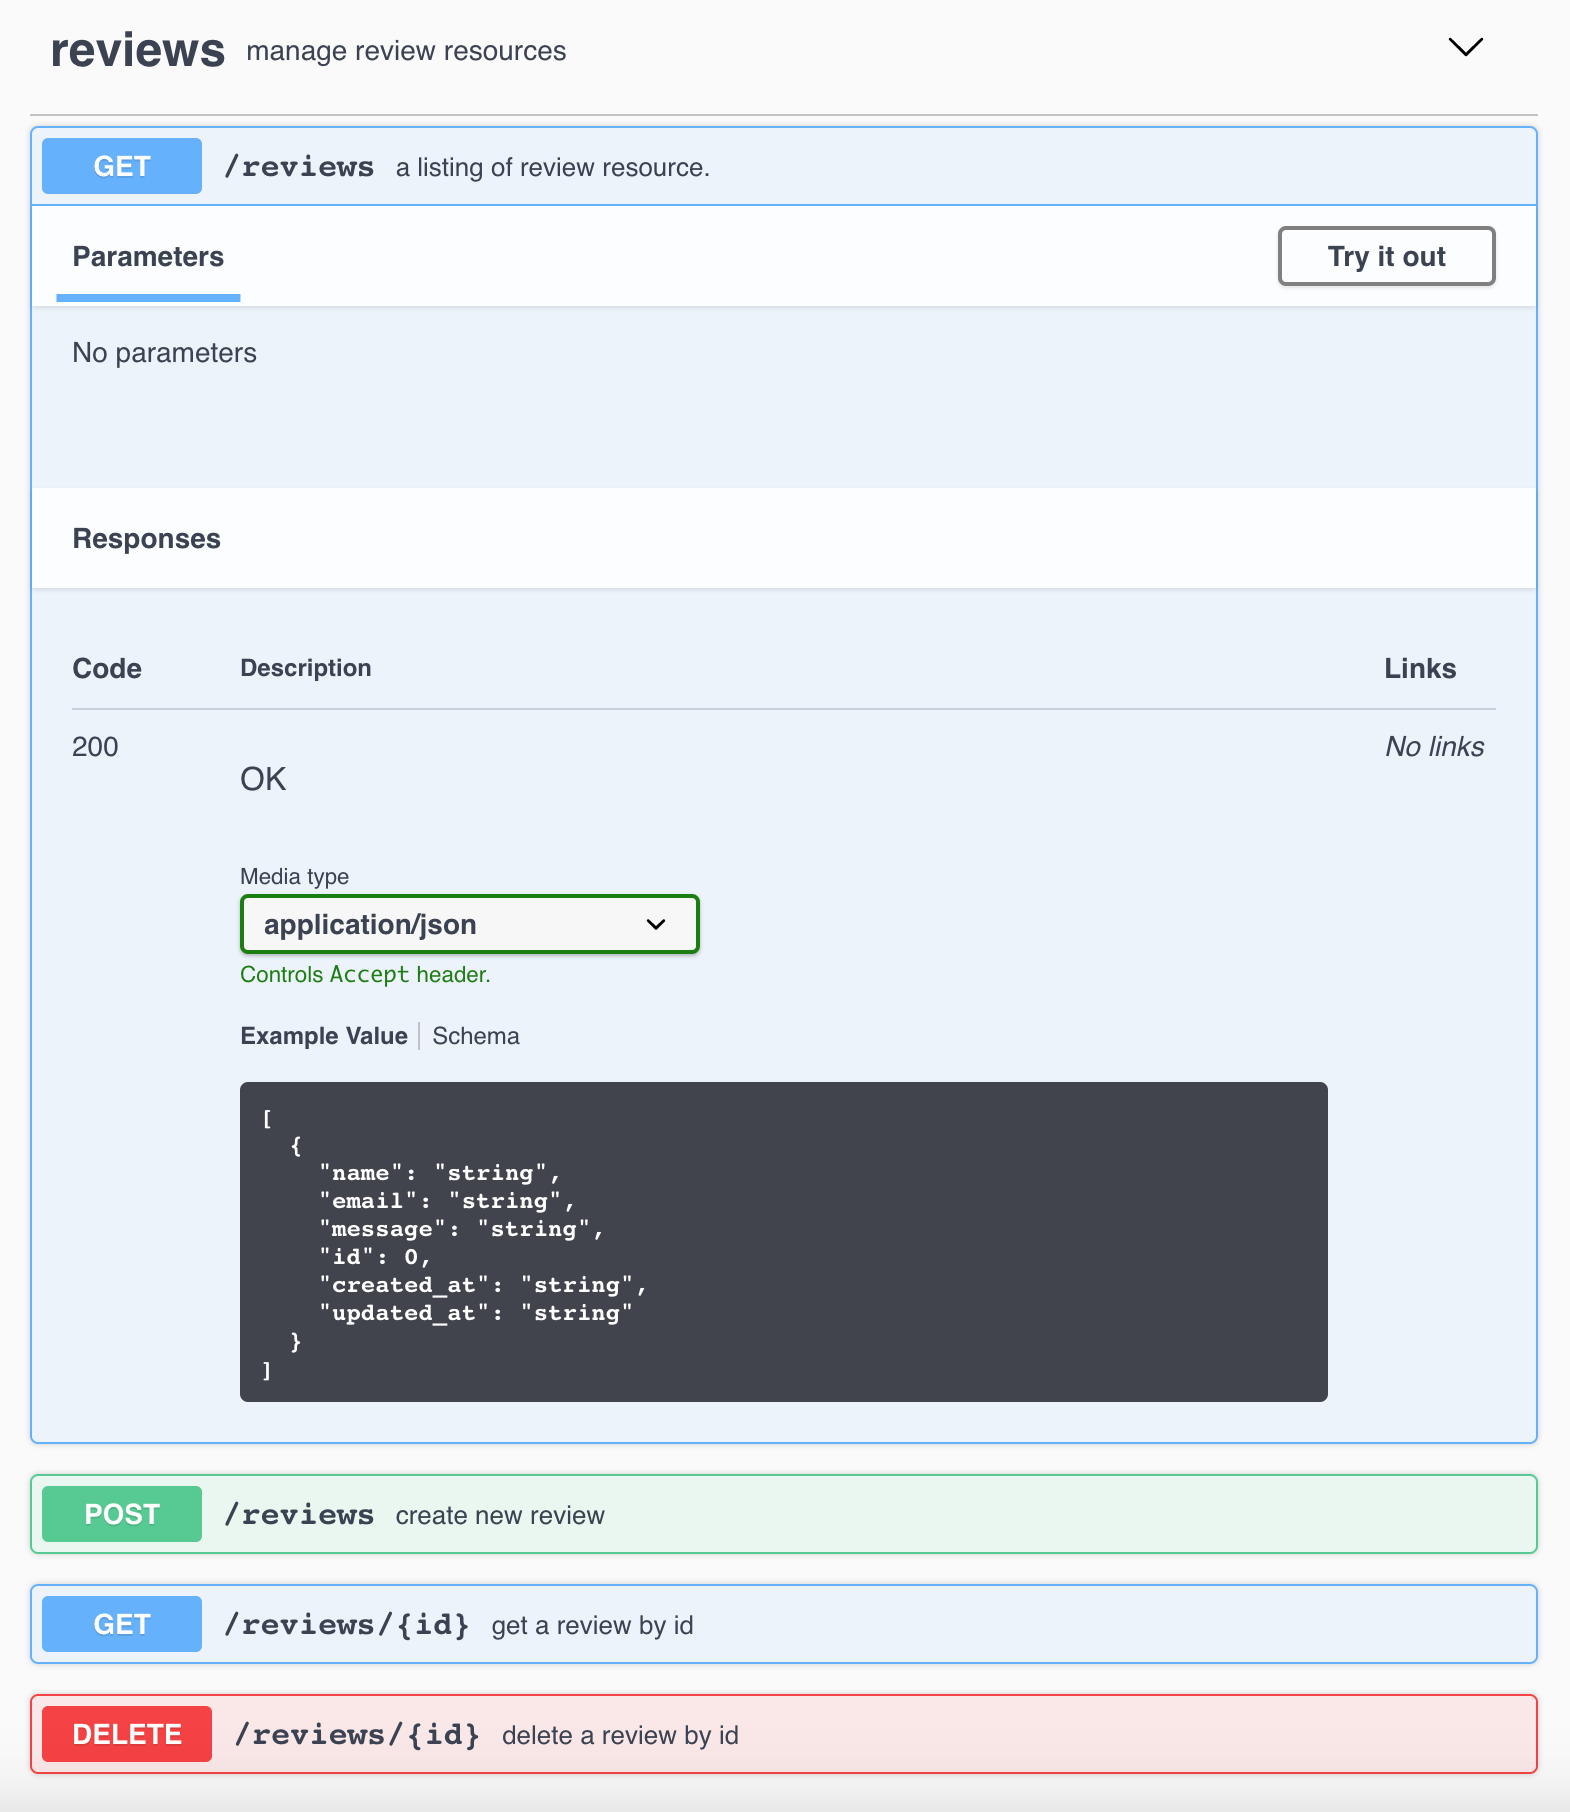
Next you will create a migration file for creating the new table, how about creating an API for writing reviews?
php artisan make:migration --create=reviews create_reviews_table

Created Migration: Created Migration: 2020_08_11_153927_create_reviews_table
Edit the database/migrations/Created Migration: 2020_08_11_153927_create_reviews_table file to have the following content
Note:- date and time of calling the command will change the file name accordingly
<?php

use Illuminate\Database\Migrations\Migration;
use Illuminate\Database\Schema\Blueprint;
use Illuminate\Support\Facades\Schema;

class CreateReviewsTable extends Migration
{
    /**
     * Run the migrations.
     *
     * @return void
     */
    public function up()
    {
        Schema::create('reviews', function (Blueprint $table) {
            $table->id();
            $table->string('name');
            $table->string('email');
            $table->text('message');
            $table->timestamps();
        });
    }

    /**
     * Reverse the migrations.
     *
     * @return void
     */
    public function down()
    {
        Schema::dropIfExists('reviews');
    }
}
Here we are creating reviews table with the name, email, and message columns. Next we will run the migration tool so that this table will actually be created.
php artisan migrate

Migrating: 2014_10_12_000000_create_users_table
Migrated:  2014_10_12_000000_create_users_table (0.01 seconds)
Migrating: 2014_10_12_100000_create_password_resets_table
Migrated:  2014_10_12_100000_create_password_resets_table (0 seconds)
Migrating: 2020_08_11_153927_create_reviews_table
Migrated:  2020_08_11_153927_create_reviews_table (0 seconds)
Next let us create a model class and controller class in one go
php artisan make:controller Reviews -m Review

 A App\Review model does not exist. Do you want to generate it? (yes/no) [yes]:
 > yes

Model created successfully.
Controller created successfully.
We basically created a Reviews controller class in app/Http/Controllers/Reviews.php along with a model class in
app/Review.php
Take a look at those files to understand what they do
<?php

namespace App;

use Illuminate\Database\Eloquent\Model;

/**
 * Class Review
 *
 * @property-read  int    $id
 * @property       string $name
 * @property       string $email
 * @property       string $message
 * @property-read  string $created_at {@type date}
 * @property-read  string $updated_at {@type date}
 *
 */
 class Review extends Model
{
  //...
}
As you can see the model class has @property comments that links it to
the database table structure we created earlier with a migration
Lets add this new controller class and remove Home in
/routes/api.php
<?php

use App\Http\Controllers\Home;
use App\Http\Controllers\Reviews;
use Luracast\Restler\Defaults;
use Luracast\Restler\OpenApi3\Explorer;
use Luracast\Restler\Router;

try {
    Defaults::$productionMode = getenv('APP_ENV') == 'production';
    Router::mapApiClasses([
        '' => Explorer::class,
        //Home::class,
        Reviews::class,
    ]);
    $routes = Router::toArray();
} catch (Throwable $throwable) {
    die($throwable->getMessage() . PHP_EOL);
}
And then run the server again with php artisan serve
You will see the following

Create few reviews by calling POST /reviews in explorer
You will see the listing api as follows when you expand GET /reviews
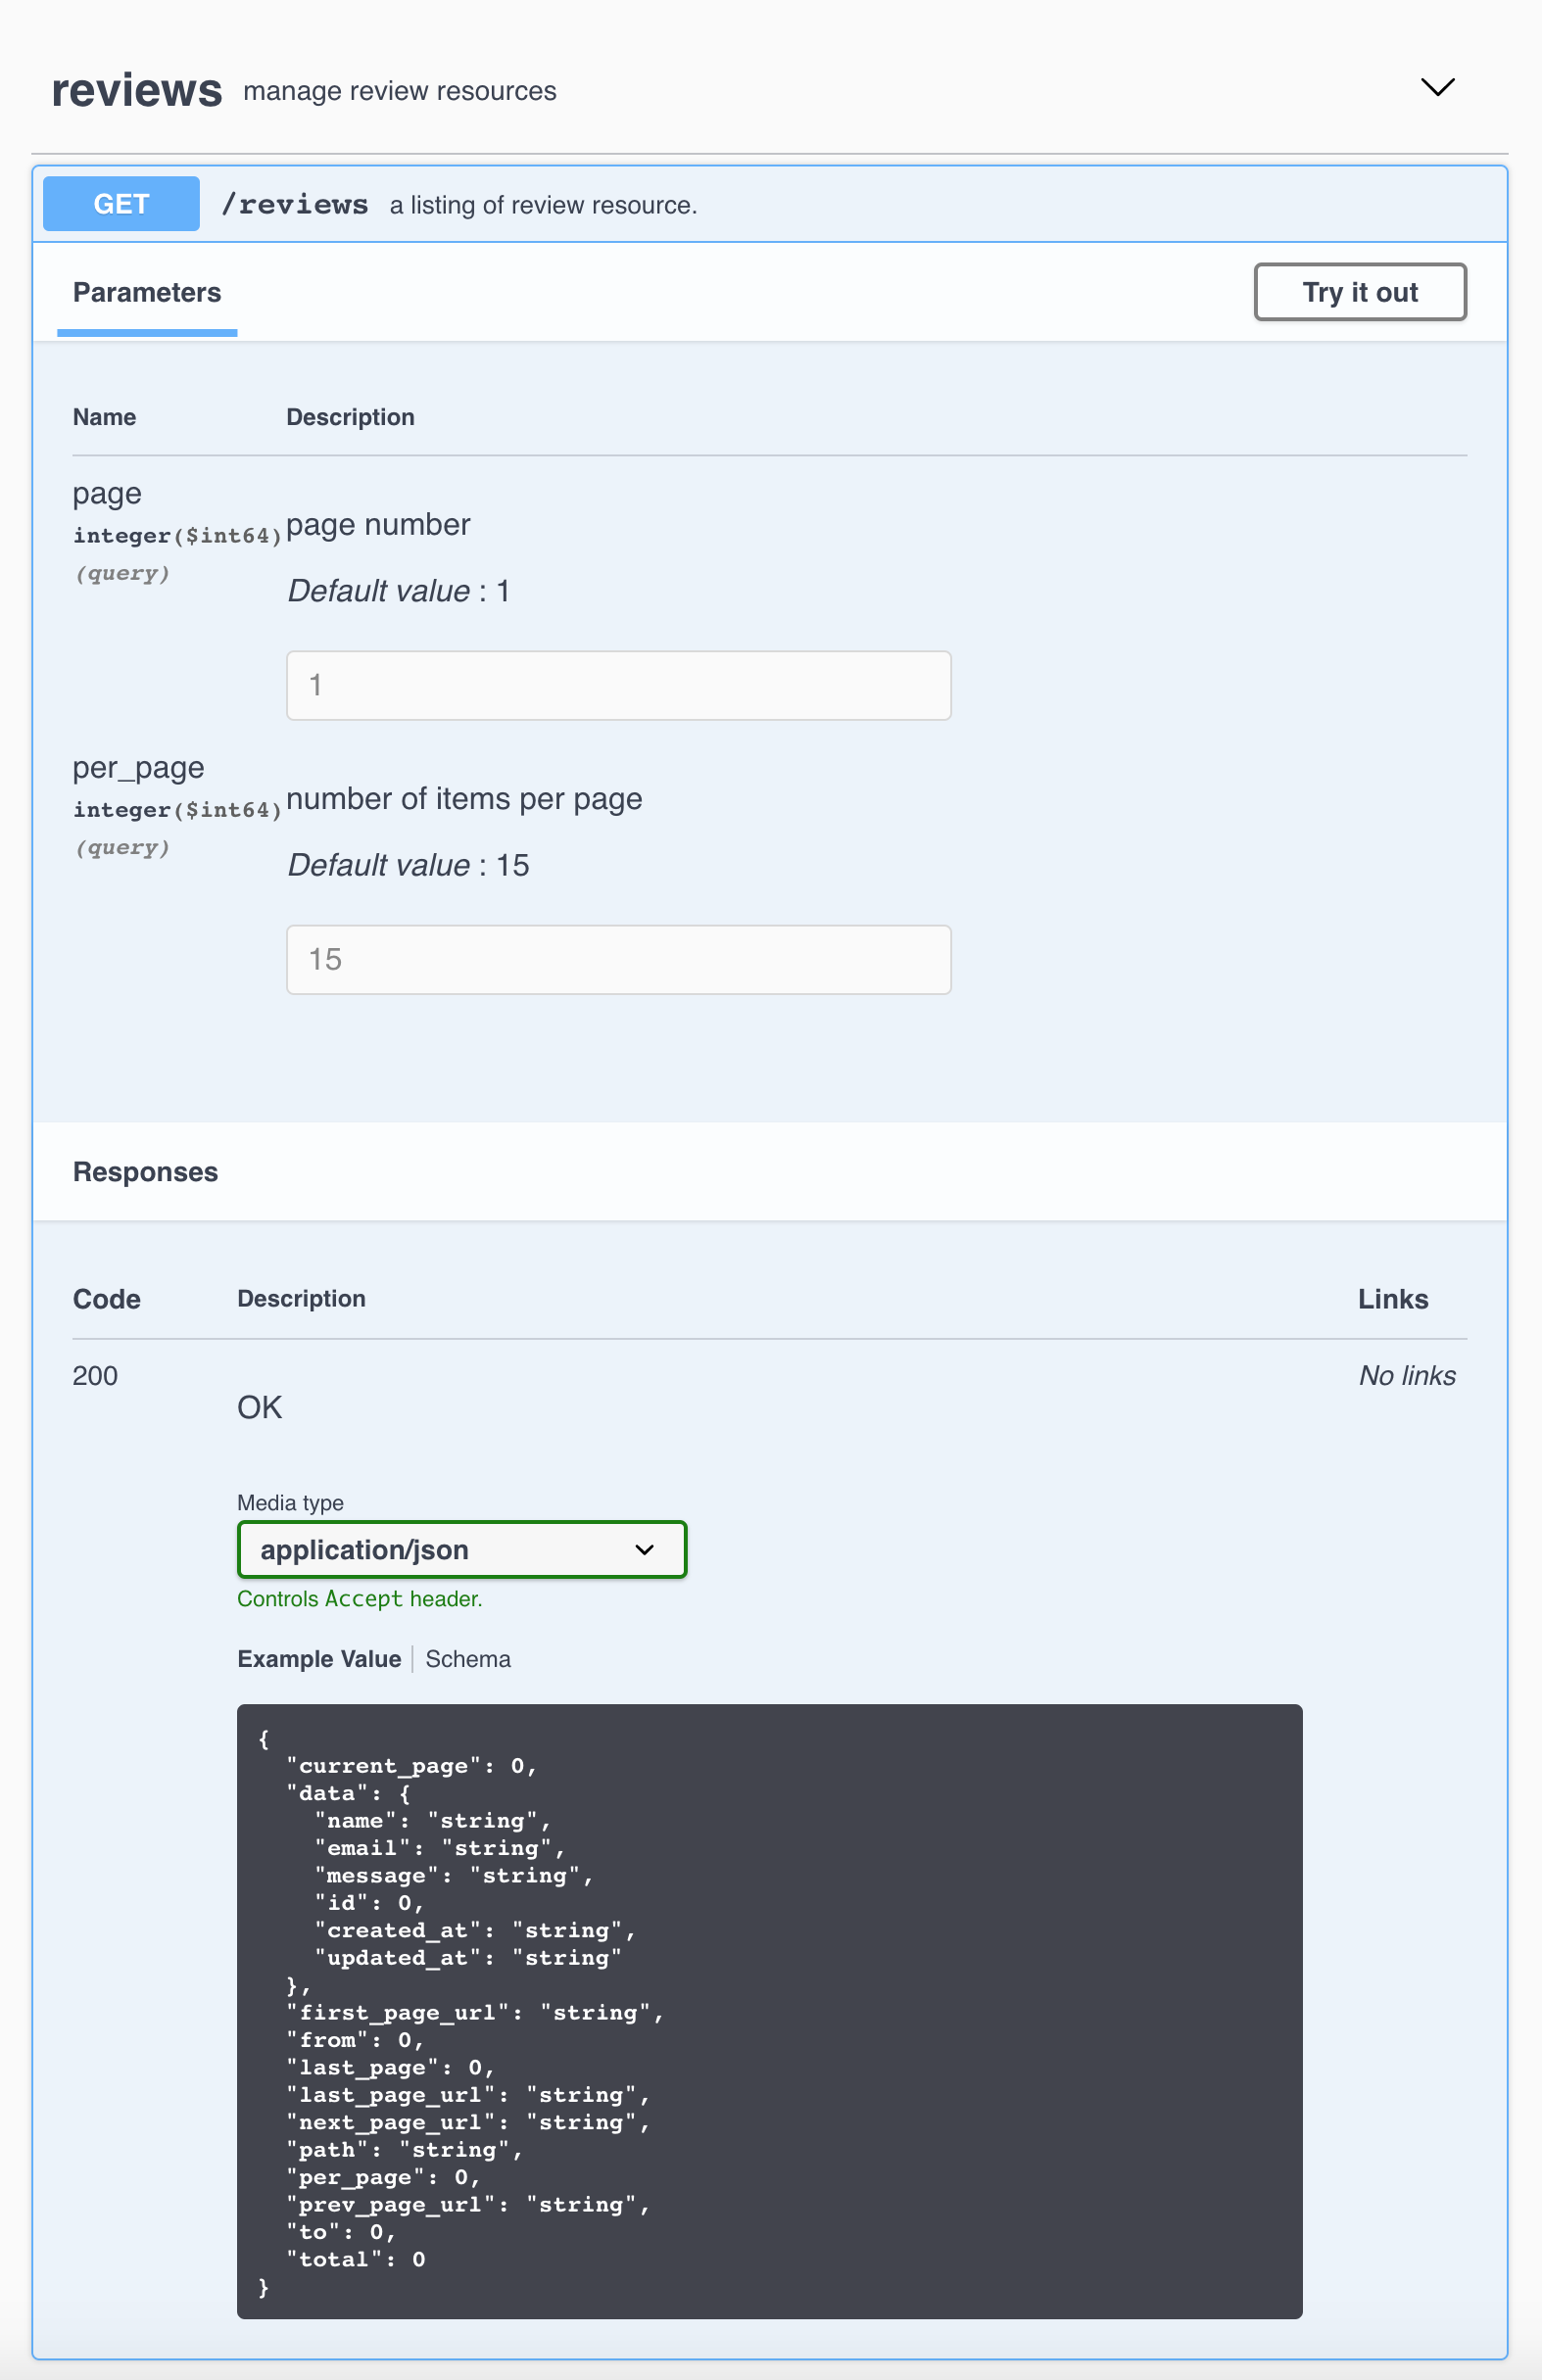
It will be great if we can paginate our listing, right?
Lets re-generate the controller class with pagination
php artisan make:controller Reviews -m Review -p

Controller already exists!

php artisan make:controller Reviews -m Review -p --force

Controller created successfully.
Note the addition of -p to paginate and --force to
force overwriting the controller class.
Now we have pagination support as shown below
Make sure all the folders inside storage/framework/cache have write permission for the application to write the needed files for caching
Create .env by cloning .env.example
cp .env.example .env
and update the environment as follows
APP_ENV=production
You may also update the database configuration inside the .env file
Now Restler should be running in production mode and laravel related components are running under production environment!
Note:- when running in production mode restler won't detect addition or removal of an api. You need to manually delete the cache files under
storage/framework/cache